 What do you need to buy:
- Raspberry Pi 3 model B board
- 5 volt 2.5A microB usb power supply (recommended 3A or higher when connecting erxternal hardware/sensors)
- 8GB (or higher) microSD card (optional with SD adapter)
What should you allready have
- Laptop/PC with microSD or SD card slot
- a wifi router with wired ethernet connections
A basic how/to or getting started with raspberry pi guide can be found at the raspberry official website.
For my project I'm going to setup raspberry board that is not connected to a display, nor keyboard and mouse. The raspberry pi will act as a sensor server. It collects/handle all sensor information and execute jobs depending on the sensors data. The management and configuration of the board will be done remotly via ssh connection. Later it might be possible to setup and create a user friendly webinterface on the raspberry pi board.
on your (windows) laptop/pc
- download Putty
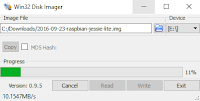
- download Win32DiskImager
- download the raspberry pi linux distro. I downloaded the RASPBIAN JESSIE LITE
 - insert the microsd card
- start the Win32DiskImager application
- Use the Win32DiskImager application to write the raspbian jessie lite operating system image to the microsd card
- wait until job is done
- remove sd card from your laptop/pc
on your raspberry pi board
- insert micro sd card
- connect network cable to your home network (router)
- connect 5v micro usb power adapter
- the board will power on and load the raspbian operating system (red led and green led visible)


No comments:
Post a Comment